As most of you know, printing on campus has been limited due to a very serious worldwide bug in Microsoft printer drivers that could potentially give anyone access to our network and shut it down in a ransomware attack. Not good. Schools and businesses around the world are having to deal with this while Microsoft works on a fix. It appears to be a difficult problem to solve as this has been going on for months.
As a result, Douglas College has severely limited the ability to do any network printing. This includes sending anything from our office computers to the photocopiers. Some computers don’t even have the printer drivers installed. Even if you do, you can’t print after 4:30pm and on weekends. That brings us to this little-known function of our Konica Minolta photocopiers: printing from a USB drive. It basically means you can copy files from your computer (PDFs, Word and Excel documents, and images) onto a USB drive, and you can then plug that drive into the photocopier and print. You can even scan directly to the USB drive without having to email it to yourself. This also solves the file-size limits set by the email server.
Here is how you can print directly from a USB drive:


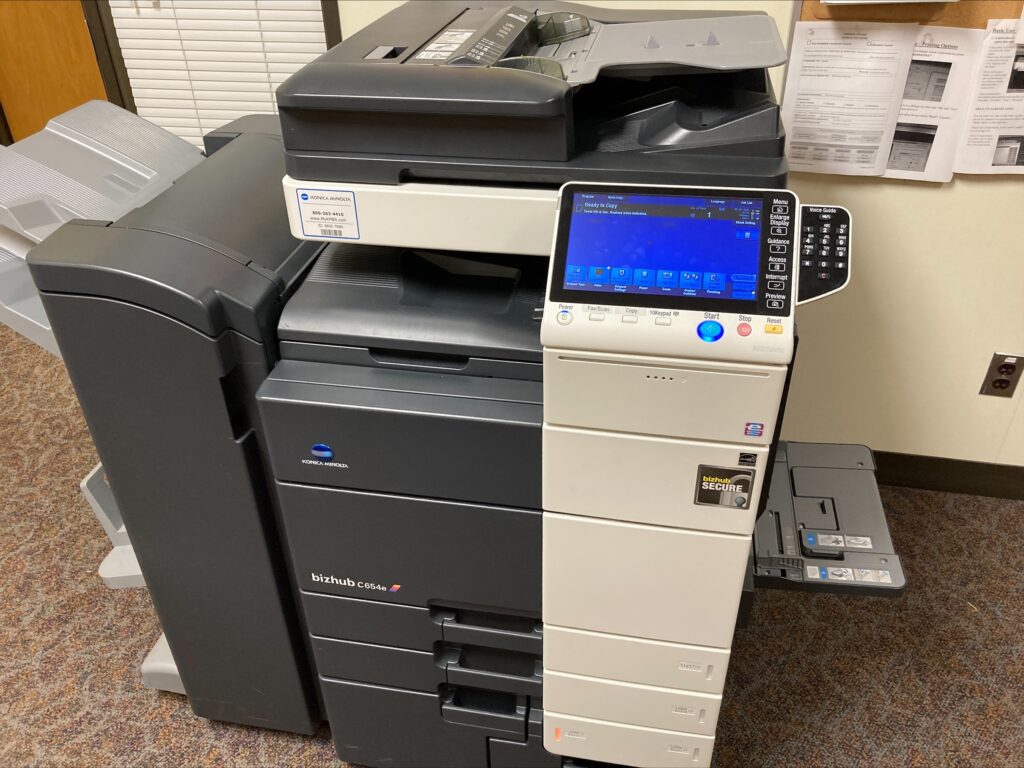
Locate the USB port on the right side of the photocopier. It might be near the lid, or it might be down below the screen. Insert your USB drive into the slot.
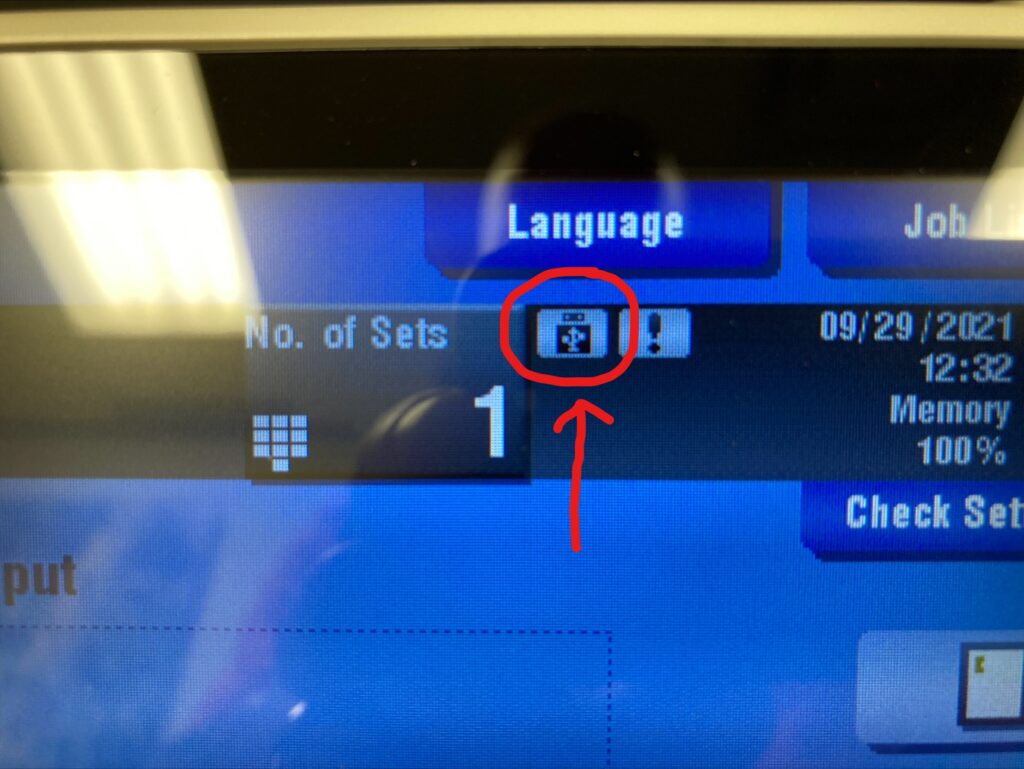
If nothing happens, look for this symbol at the top of the screen and click on it.
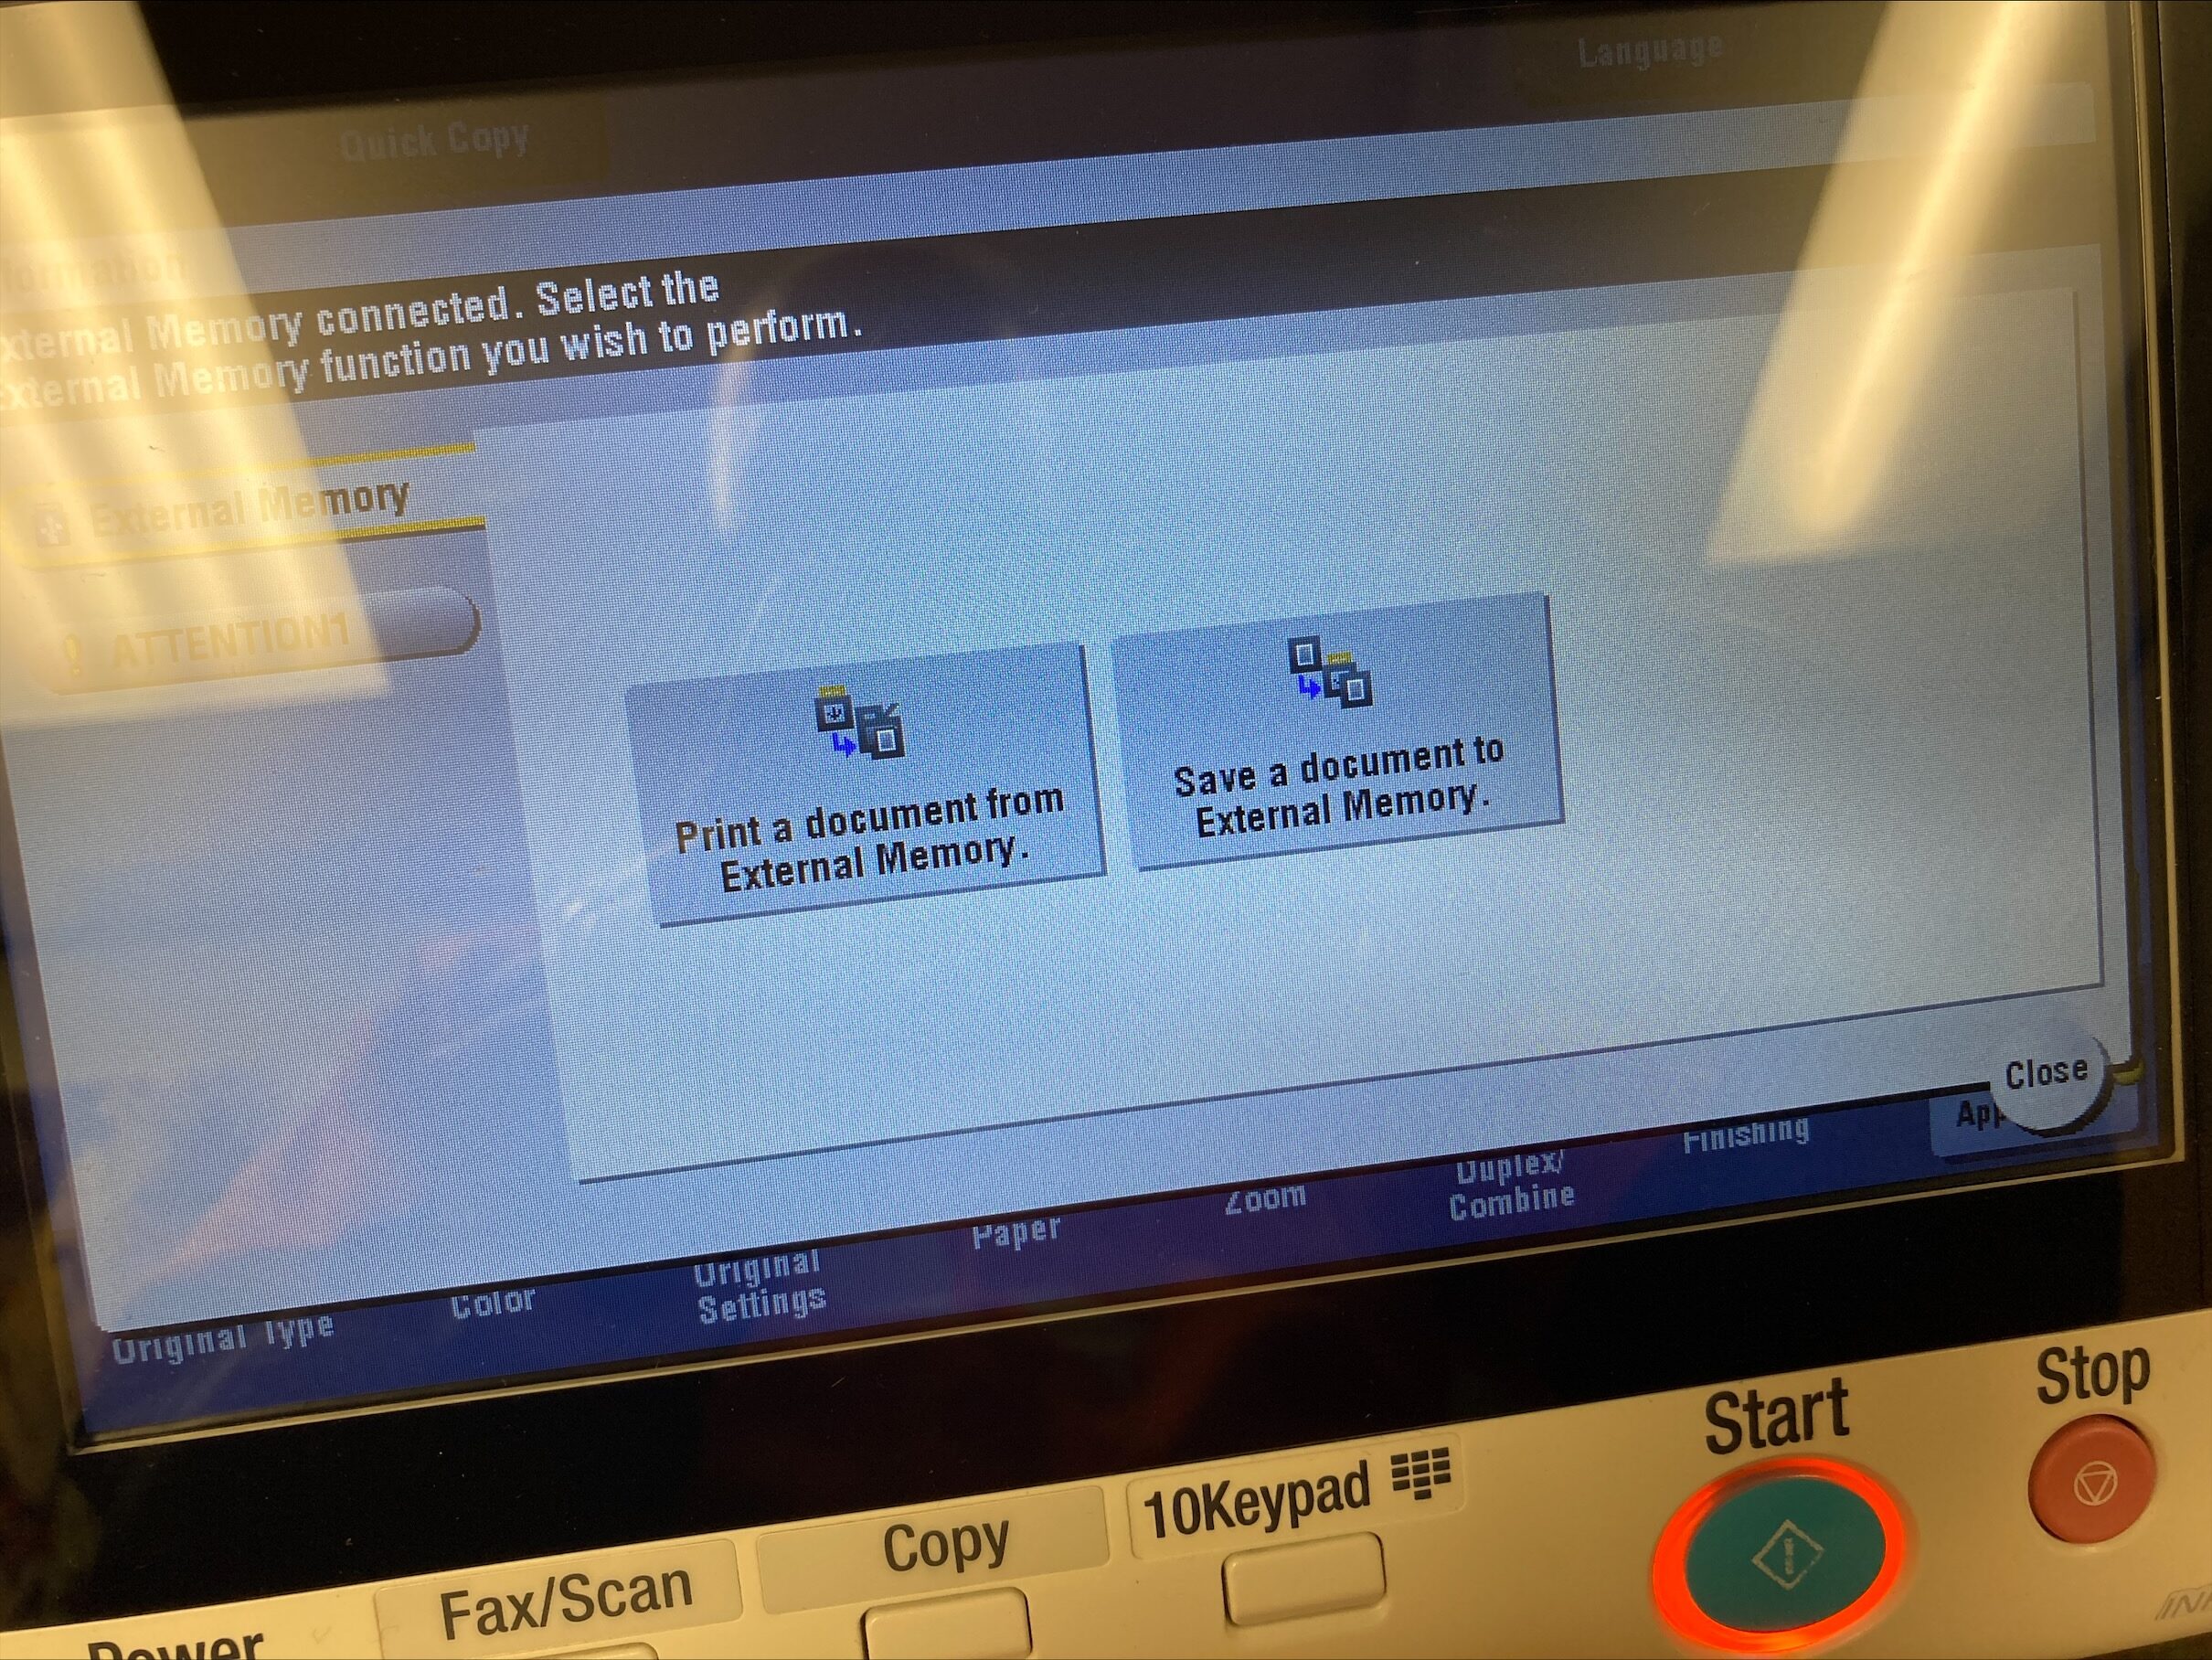
This screen will either pop up on its own, or it will appear after clicking on the symbol mentioned in the previous step. Once you see this screen, click on Print a document from External Memory.
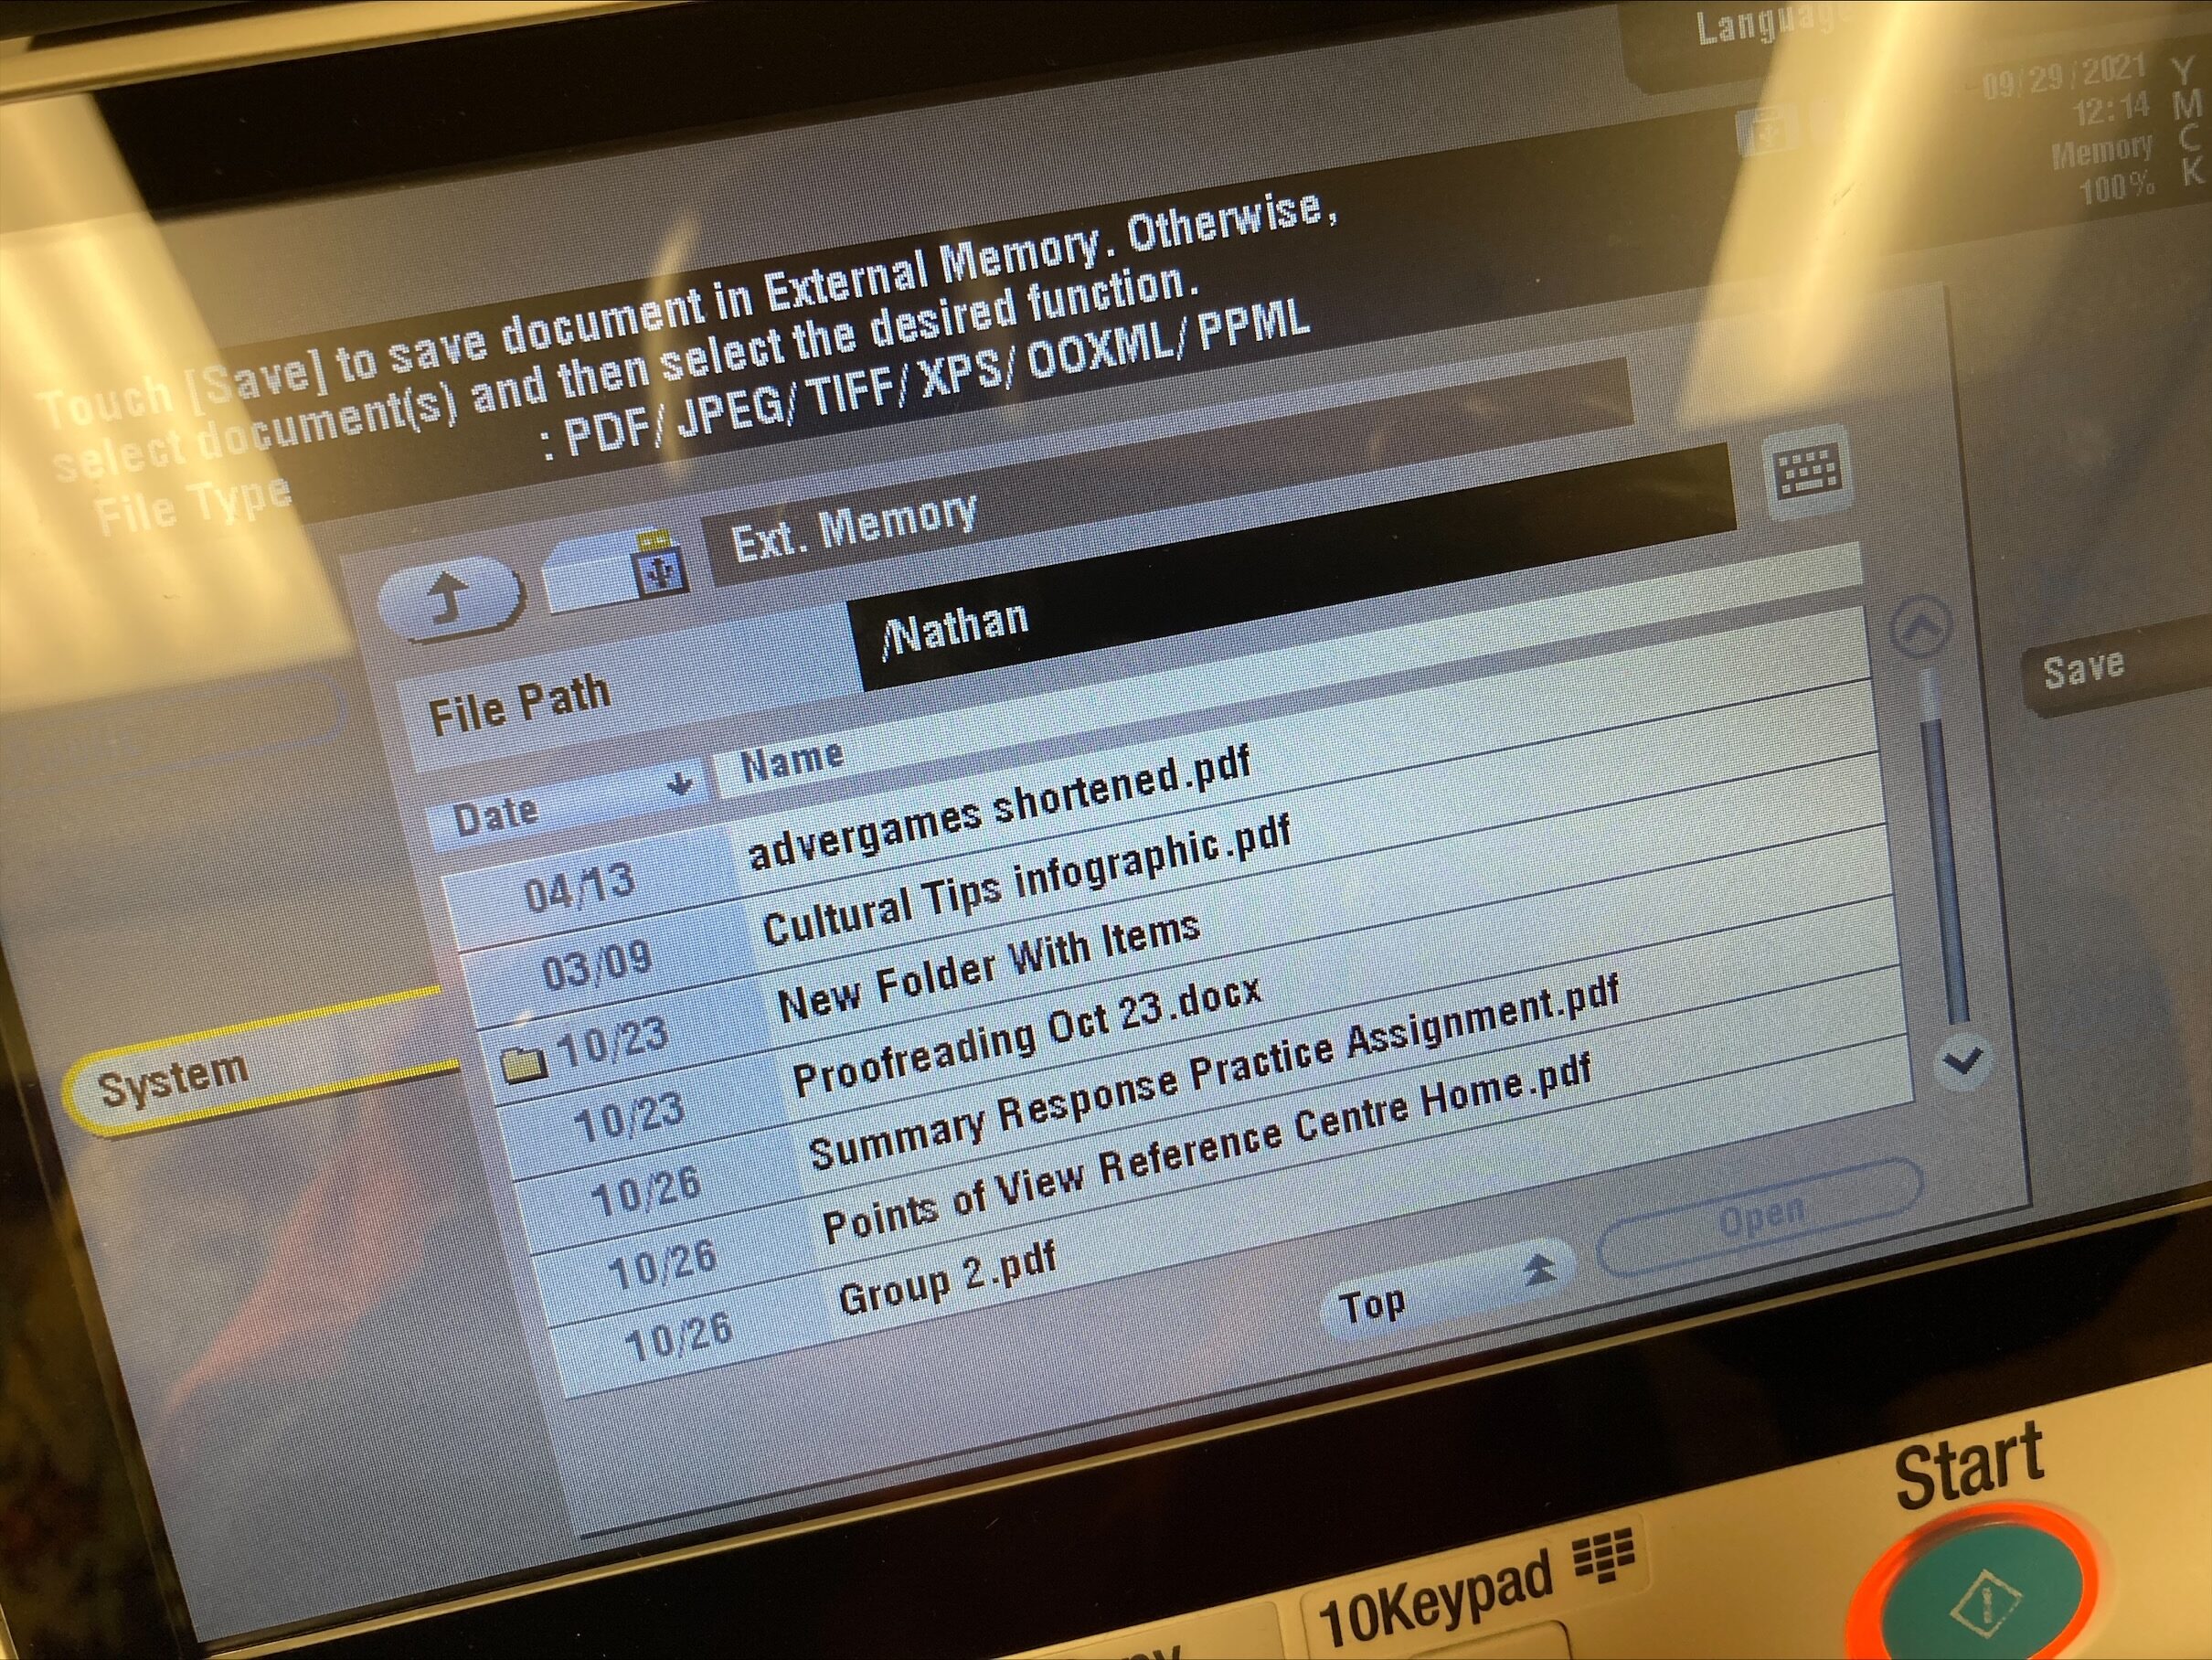
A list of your files and folders will appear. You can select more than one document to print. Once you select an item, it will change colour and a Print button will appear on the right side of the screen. Once you have selected everything you want to print, click on the Print button.
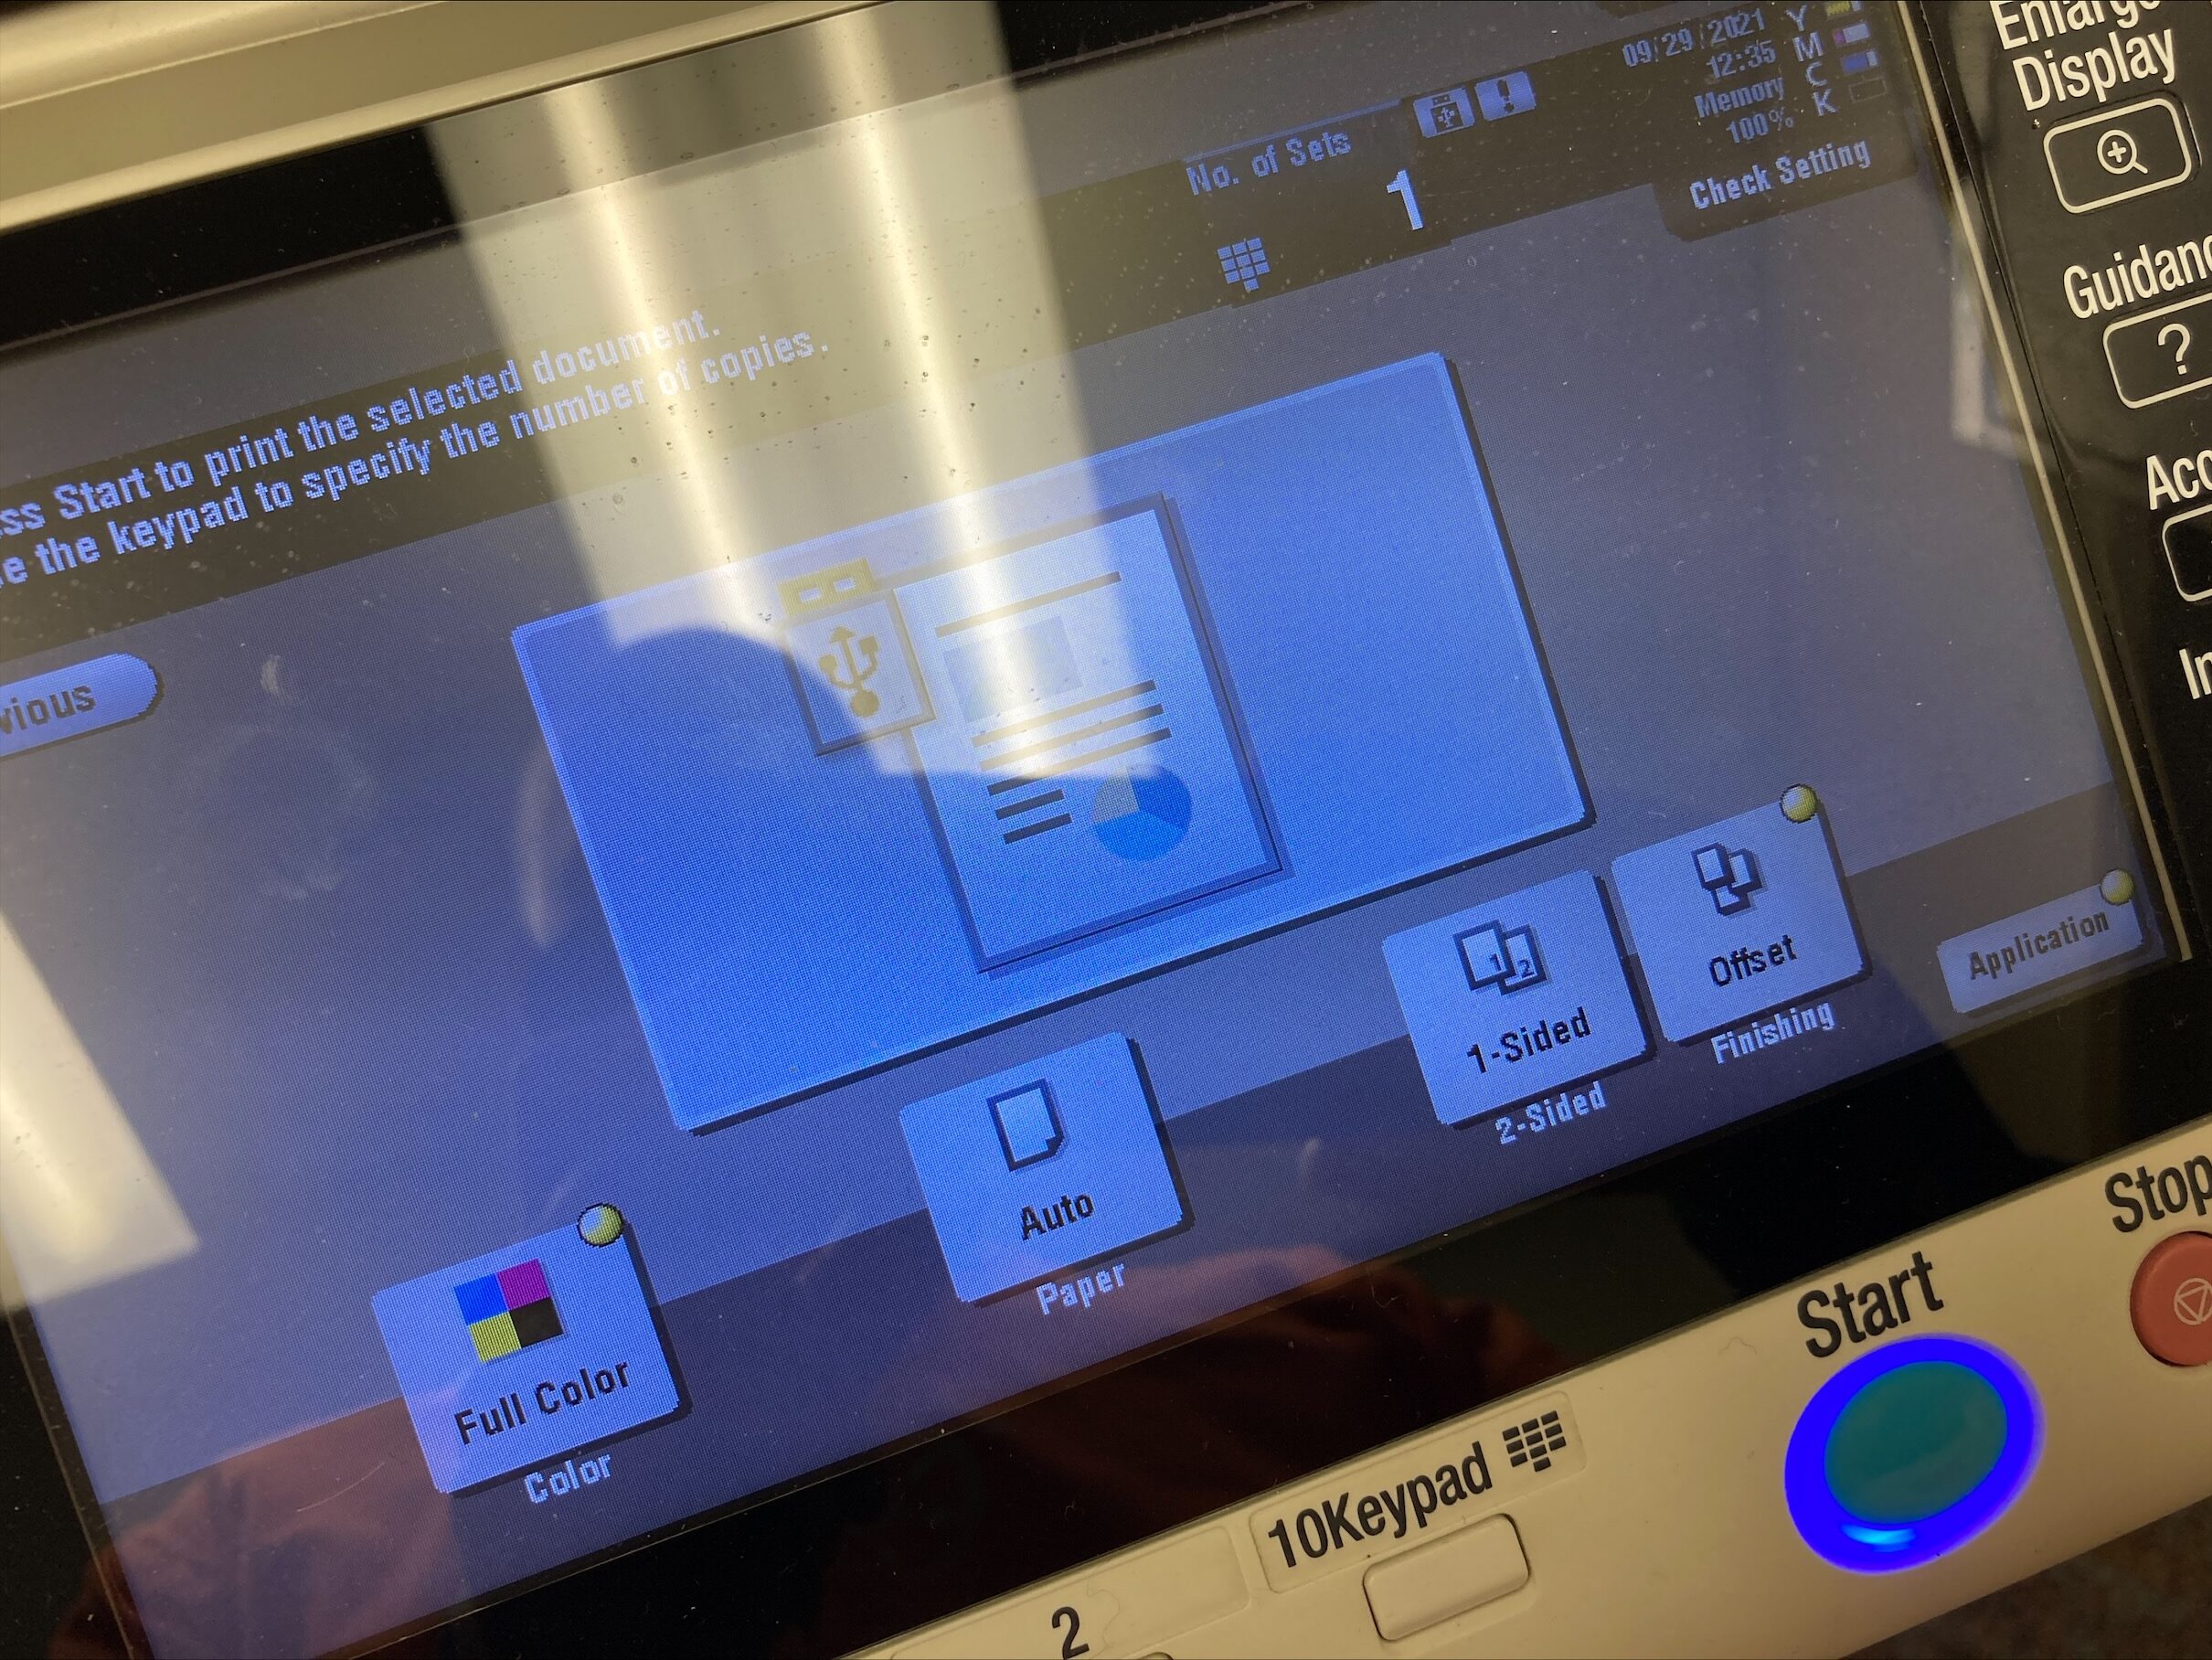
You have a few options on the screen such as colour or B&W, paper source, and single- or double-sided printing. Once you have made your choices, click on the Start button to print. DO NOT pull out the USB drive until it is finished printing. Once it is done, it is safe to simply remove the drive.